Document Center Overview
- nia

- Apr 4, 2021
- 1 min read
In this guide, we will walk you through three common tasks that are performed on a regular basis within VisibilityOne's Document Center. But first, let's get started with some informational details about storage availability within each account.
By default, each company account is enabled with 5Gb of storage. Additional storage is available by contacting your account manager.
To view your current storage usage, from your VisibilityOne dashboard select the menu button (1), next select Document Center (2), and on the top of the file list, you will find your details (3). The storage details includes...
Files: This are the total number of files uploaded across your account.
Storage: This is the total storage space allocated to your account.
Used: This is the total storage being consumed by the uploaded files.
Available: This is the available storage for your account.

How to upload a file
From your monitored room DNA page, select the "Admin" button.

Next, within the admin section, select the "Documents" button (1).
You now have the ability to upload documents, files, and images by selecting the "Upload" button (2).
Once your upload is complete, you can now share, download, or delete your files.

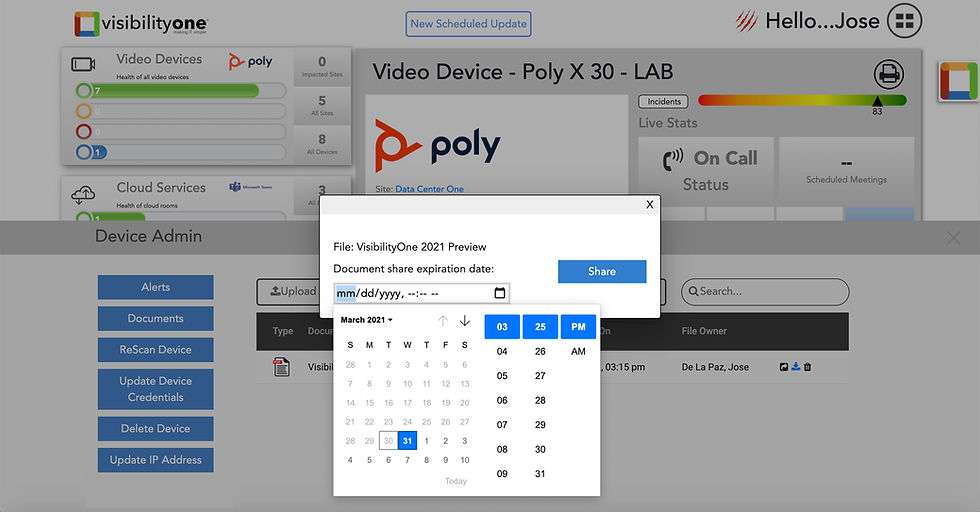
Sharing a file
By selecting the share icon, you will be able to select the expiration date and time. Upon selecting the expiration date and clicking "Share", you will create a link that is shareable externally.

For more question or information please contact our team by emailing us at info@Visibility.one


Comments