Tutorial - 10 step setup
- nia

- Nov 8, 2018
- 2 min read
Updated: Jan 4, 2019
This tutorial will walk you through the first steps you should perform to start monitoring your video conferencing devices.
Upon successful login you will see following screen or you can access the section by clicking on the menu button located on the upper right hand side of your screen and selecting "memberships & subscriptions" followed by clicking on the "VisibilityOne" logo.

1. Let's get started and create your first site! Click on the 'Create a New Site' button.

2. Complete the form information, it will be used to create your fist site. Remember, you can create multiple sites at anytime but for now we will focus on your first one.

3. Once all information in 'create a site' form is filled out and entered. The next step is to click on 'Download Collector VisibilityOne' to begin the app download.

4. If app has downloaded and installed successfully, a 6-digit pin will show. Write down the pin you will need it. Next click the url below the pin to return to visibilityone and verify the site created in step 2.

5. Now click on 'verify', to enter your pin.

6. enter your app pin and click enter.

7. Now it's time to select the device or service you would like to monitor.

8. Assuming you selected to monitor a Polycom or Cisco video device, select a site from your list*. Now name the room in which the device you will monitor is located. Add the IP address of the video device followed by the device admin username & password. Click 'search device'...

9. Your discovered device details will appear next. Congratulations!! Click 'add device' to finish up.
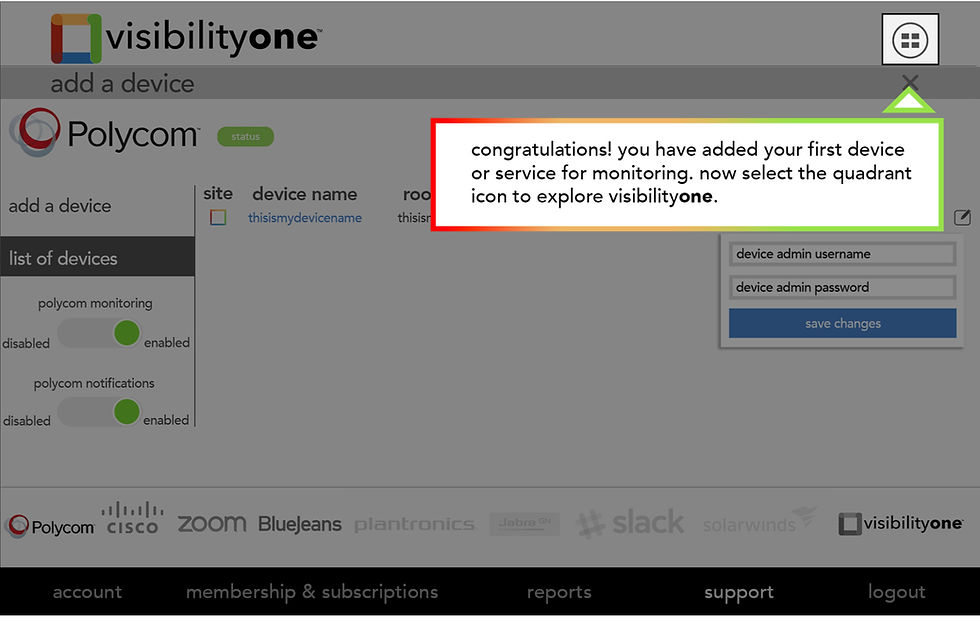
10. Done, click on the quadrant icon to view your monitoring information in our quadrant.

Commentaires